Skip to content

WSS

Awesomizing your SharePoint picture libraries in no time

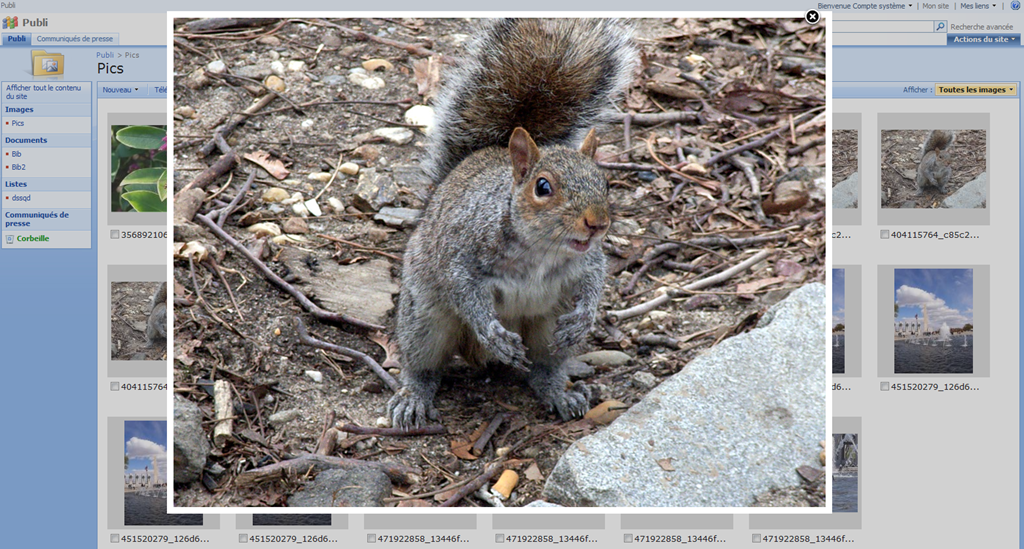
Still using those plain olds SharePoint picture libraries? You know the libraries where a click on a thumbnail brings ups the DispaForm.aspx pages with details about the pics that none of your users care about. What about having your picture in your libraries shown this way instead : A much better look, don't you think? Guess what, it’s as easy as ABC to enhance the way your picture libraries look like with very nice inpage popup.
The basics

To do that you need:

  • jQuery, a javascript library to ease development
  • FancyBox, a jQuery plugin to handle picture zoom/magnification automatically
  • A Content Editor Web Part, I use this editor web part to push my JavaScript code that will
  • Change the thumbnail so that they link to the full size picture instead of the Picture detail
  • Tell fancybox to do its magic so that these regular links launches a zoom on the full size picture
A detailed walkthrough
  • Get jQuery from (http://jquery.com/ )
  • Get FancyBox from: (http://fancybox.net/ )
  • Extract the fancybox folder from the zip you got
  • Put the jQuery file and fancybox in someplace your user can access. For the sake of simplicity I am going to put these files in a document library for this walkthrough. In a real world scenario I am putting these files in the 12 using a WSP.
  • Create or open an existing document library
  • Create a JS folder (or not, I just like my stuff to be organized)
  • Push the jquery-1.4.2.min.js and fancybox folder in.
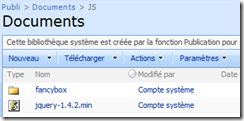
image

  • Now you can go to your Picture Library and Edit the page (screen grabbed from a French WSS Install)
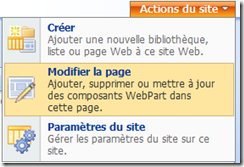
clip_image001

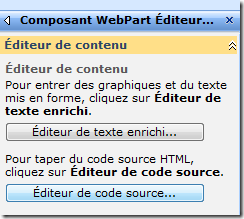
  • Add a Content Editor Web Part and edit it
  • Open the “Source Editor”

clip_image002 Paste the following code

<script type="text/javascript" src="/Documents/JS/jquery-1.4.2.min.js"></script>
<script type="text/javascript" src="/Documents/JS/fancybox/jquery.fancybox-1.3.1.pack.js"></script>
<link rel="stylesheet" href="/Documents/JS/fancybox/jquery.fancybox-1.3.1.css" type="text/css" media="screen" />
<script type="text/javascript">
// Jonathan Roussel
$(document).ready(function() {
//for each IMG node children of a A node in a .thumbnail class section
$(".thumbnail a > IMG").each(function(){
if($(this).attr('alt') == 'Image')
{
// Replace thumbnail link from item page to the pic itself
var imageUrl = $(this).attr('src');
// Change http://moss/pics/_t/MyPics_jpg.jpg
// In - http://moss/pics/MyPics.jpg
// using a regular expression
imageUrl = imageUrl.replace(/((.)+)\/_t\/((.)+)_([a-z]{3})\.[a-z]{3}/gi,'$1/$3.$5');
$(this).parent().attr('href',imageUrl );
$(this).parent().attr('rel','Gallerie' );
$(this).attr('alt','');
//plugin fancybox
$(this).parent().fancybox({'cyclic':true});
}
});
});
</script>
  • Press Ok and enjoy the magic of Fancybox.

The result might not yet be perfect; the two following notes shall set everything straight.

Notes 1,of missing GUI pics

The path to the pictures in the CSS might need to be modified for the pictures used by fancybox to work . So if you don’t see any Loading, Close, Prev, Next button, open the CSS in the document library (/documents/js/fancybox/jquery.fancybox-1.3.1.css) And replace (src='/fancybox with (src='/documents/js/fancybox Reload the Image Library in Internet Explorer and the pics shall be there.

Note 2, of using this with IE8:
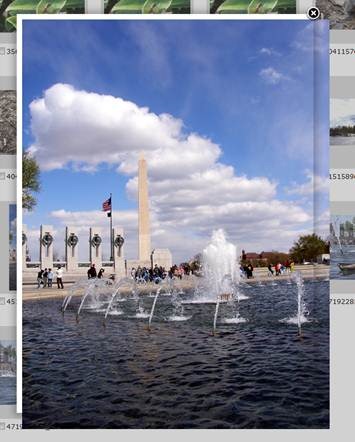
Fancybox, SharePoint and IE8. Needs some fixing This component seems to have trouble with IE8 and SharePoint. Without a strict XHTML doctype the picture frame are messed up as you can see on the right: Fancybox, SharePoint and IE8. A match fixed ! As adding an XHTML strict doctype was a no go, I tried to circumvent the problem by removing the frame and setting the white frame right. Here is the result: Not as nice as what fancybox can do (lost the gradient border) but good enough for my purpose. To get this result you will need to do these modifications in the css file (the same on you modified in note 1):
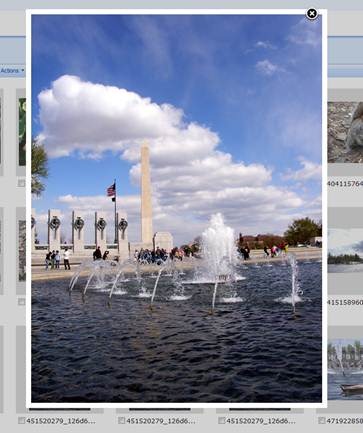
Original & Instructions Target
#fancybox-outer replace line
background: #FFF;
top:-10px !important;
left:-10px !important;
/*background: #FFF; */
#fancybox-inner replace line
top: 0;
left: 0;
top: 0 !important;
left: 0 !important;
.fancy-bg add line display: none !important;
Add at the end of the file .fancybox-ie {
background-color:#fff;
}
After saving the CSS and reloading the page you should be all set and ready to receive your end user congratulations :)
>
Of course, this is only a start. The next step would be to have the picture retrieved by a Content Query Web Part with the fancybox magic added. It would mean losing the option to download multiple picture and it would allow for an even better rendering.

SharePoint Walktrough - Displaying List Items with their attachments Part 1/2

image The SharePoint Out Of the Box List View Web Part is quite powerful, yet it isn’t able to display the attachments of a List Item. It can show if an item has any attachments (with a nice paper-clip icon) but you won’t be able to download these attachments directly. As with most SharePoint limitation, there is a workaround. Drasko Popovic wrote about a JavaScript based workaround on CodeProject you might want to check out at http://www.codeproject.com/KB/sharepoint/DataViewAttachments.aspx. In this post I want to presents you another workaround where all processing are done server-side with a single Web Service call (Lists.asmx). You will need SharePoint Designer 2007 (freely downloadable since the 2nd April 2009 at http://www.microsoft.com/downloads/details.aspx?FamilyID=baa3ad86-bfc1-4bd4-9812-d9e710d44f42&displaylang=en ) and of course a MOSS or WSS instance. As this walkthrough is pretty long for a blog post, it is split into two parts. If you already how to create a Data View web part to display the elements of a list through calls to the Lists.asmx web service, I would suggest you to move to part 2 of this walkthrough.

0 – Principle/Rationale

We have a list in a SharePoint site and want to display the titles of this list’s elements along with direct links to their attachments. We are going to create a Data View Web Part using SharePoint Designer, this Data View will consume the SharePoint Web Service to get the items of a list along with their attachments. The data view will display these items using a XSL we will define. As a bonus this method will allows us to display the list items on a different SharePoint site or collection than the list itself.

1 – Create or Open a page

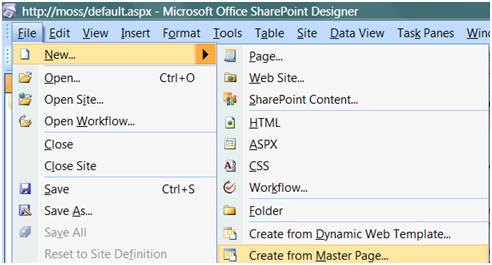
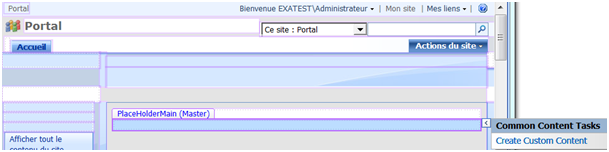
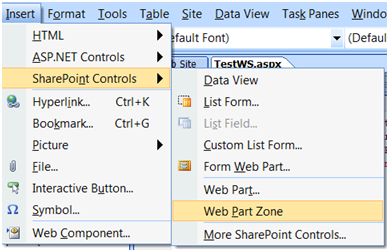
In SharePoint Designer after opening your site, either open an existing page or create a new one. I choose this last option: image Make some room for our content in the PlaceHolderMain zone of the page by creating a custom content. image Adding a Web Part zone isn’t mandatory but I strongly recommend it at this point. Click in the new Custom Content Zone you created in the design view, then click Insert|SharePoint Controls| Web Part Zone. image You should get something looking like that in the Design View: image SharePoint Designer is sometimes quite buggy, saving frequently from this point on might be a good idea. You can save the page wherever you want to. If you are creating multiple custom pages, creating a dedicated Document Library to hold these pages is a good idea; such a library already exists if you have activated the publication feature.

2 – Create a Web Service Data Source

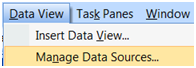
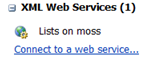
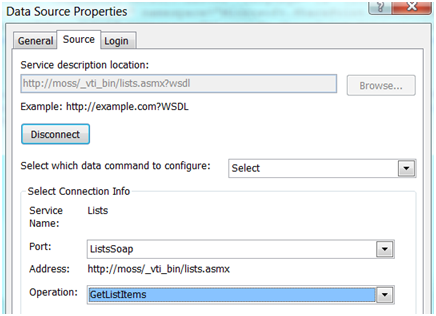
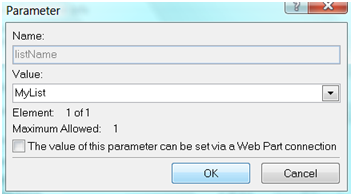
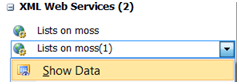
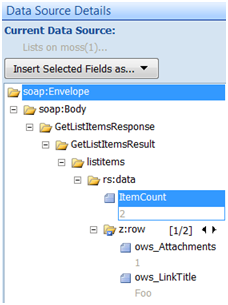
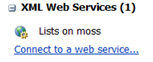
imageThe page is now ready to host our Data View web part. Open the Data Source view by clicking Data View| Manage Data Sources. imageChoose to connect to a web service: In the Service Description Location enter: http://SP_SITE_URL/_vti_bin/lists.asmx, then click connect and choose the GetListItems operation: image imageDouble click on the listName parameter and enter the name or guid (between brackets {}) of your list. imageValidate the Data Source Properties and check that it is working correctly by trying to see the data returned by this data source: If a new panel opens with the list data, it means it’s working. image

Troubleshooting:

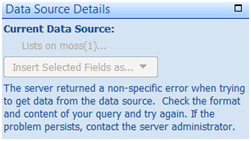
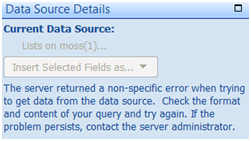
If it isn’t working you will be presented with an enigmatic error message giving you absolutely no details: image This can be caused by numerous reasons you want to check:

  • The name or guid of the list is invalid
  • You tried to specify other parameters of the Web Service such as QueryOptions or ViewFields. These parameters can’t be specified at this point as the SharePoint Designer Team Blog attests it (http://blogs.msdn.com/sharepointdesigner/archive/2008/06/20/data-source-issues-and-workarounds.aspx). We will modify those latter on.
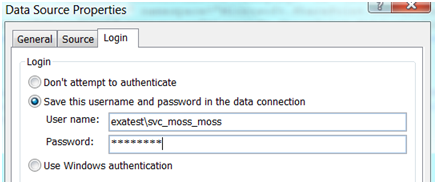
  • Problem of authentication, I need to investigate this problem but it seems like you sometimes can’t use the integrated authentication even when using a single WFE. In this case you have to change the Web Service Authentication method to basic and to specify a domain account that has the appropriate permission to read the list items and contact the web service.
Changing the Web Service authentication:

Open the Data Source properties image Open the login tab and choose basic authentication: image Save the details and try again to retrieve the data.

3 – Create the Data View Web Part

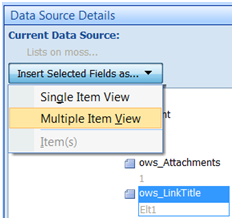
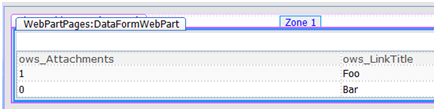
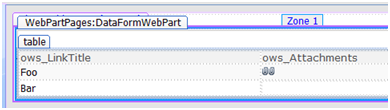
We now have a working Data Source, let’s create a web part to display it. In the Data Source Details, select the ows_LinkTitle and ows_Attachments properties and choose insert this field as a Multiple Item View (Note: you might need to select the Web Part zone in the design view of the page beforehand). image You shall now see something like that in the design view. image We know have a very basic Data View Web Part but as you may have noticed the ows_attachments fields just display the number of attachments but not the actual links to these attachments. We will see in part 2 of this walkthrough how to solve this.

SharePoint Walktrough - Displaying List Items with their attachments Part 2/2

image Recap The SharePoint Out Of the Box List View Web Part is quite powerful, yet it isn’t able to display the attachments of a List Item. It can show if an item has any attachments (with a nice paper-clip icon) but you won’t be able to download these attachments directly. I presented in Part 1 of this walkthroughhow to create a DataView part consuming the Lists.asmx Web Service in SharePoint Designer to display the elements of a list. We are now going to display the attachments of these list elements. To retrieve the attachments URLs we need to add an option to the Web Service Soap query, the “IncludeAttachmentUrls” option (details of the query options is available at http://msdn.microsoft.com/en-us/library/microsoft.sharepoint.spquery_properties.aspx). We could just open the datasource and change the QueryOptions parameter, that is if the SharePoint WSDL files were correctly defined… As it is not the case and SharePoint Designer itself isn’t perfect, you won’t be able to do that (see http://blogs.msdn.com/sharepointdesigner/archive/2008/06/20/data-source-issues-and-workarounds.aspx for reference). But there is a workaround!

4 – Modify the DataSource QueryOptions parameters

imageFirst you need to have access to the page source, so let’s switch SharePoint Designer to Split or Code view : In the code, search for the line starting with: “SharePoint:SoapDataSource”. On the same line you shall see something like “ </listName></GetListItems></soap:Body>”. image As you can see the parameters we defined in the Data Source Gui are found here and guess what, we can modify these parameters from here! So let’s add the parameter requesting the attachments url :

<queryOptions><QueryOptions><IncludeAttachmentUrls>TRUE</IncludeAttachmentUrls></QueryOptions></queryOptions>

So that the end of the soap request body looks like :

</listName><queryOptions><QueryOptions><IncludeAttachmentUrls>TRUE</IncludeAttachmentUrls></QueryOptions></queryOptions></GetListItems></soap:Body>

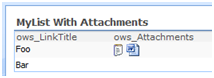
Save the page and check the result in the design view : image The ows_attachments field now contains the attachments URLs or 0 for list items with no attachments using the following format :

;#http://moss/Lists/MyList/Attachments/1/Piece.txt;#http://moss/Lists/MyList/Attachments/1/Piece2.txt;#

We still need to make some nice links out of this field. Time to put on your XSL designer gear.

5 – Modify the XSL Presentation

We first create a XSL template to transform the string given by the Web Service into a nice series of picture. You might use my sample below, paste this piece of code in the XSL part of the aspx page you are editing in SharePoint Designer (maybe just before the node “</xsl:stylesheet>”).

<xsl:template name="SplitAttachments">     
  <xsl:param name="str"/> 
  <xsl:choose>      
    <xsl:when test="contains($str,';#')">      
      <xsl:variable name="attachmentUrl" select="substring-before($str,';#')"/>      
      <xsl:if test="string-length($attachmentUrl) != 0">      
        <a href="{$attachmentUrl}"><img style="border:0px" src="/_layouts/images/attach.gif" alt='Open'/></a>      
    </xsl:if>      
    <xsl:call-template name="SplitAttachments">      
      <xsl:with-param name="str" select="substring-after($str,';#')" />      
    </xsl:call-template>      
    </xsl:when>      
  <xsl:otherwise>      
  </xsl:otherwise>      
  </xsl:choose>      
</xsl:template>

This XSL template uses a recursive template to parse the attachments and generate corresponding links and pictures. Now replace

<xsl:value-of select="@ows_Attachments"/>

By

<xsl:call-template name="SplitAttachments">    
<xsl:with-param name="str" select="@ows_Attachments" />     
</xsl:call-template>

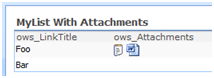
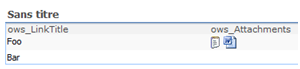
And you should see this : image The paper clip icon you see are actually pointing to the attachments.

6 – Pimp up my Data View

At this point our Data View Web Part works ok but isn't as nice as you might want it to be. As an example you might want to change these paper clips icons with icons representing the file type. The good news is that the XSL extension provided by WSS (default prefix used by SharePoint Designer is DDWRT) can handle this through a MapToIcon template. If you give a file extension to this template, it will return the icon filename corresponding to this filetype. Using the substring-after method to get the filetype we can imagine replacing :

/_layouts/images/attach.gif

By

/_layouts/images/{ddwrt:MapToIcon('',substring-after($attachmentUrl,'.'))}

imageNow save the file and check the result : It still isn't perfect but from this point on things will be much easier to improve if you know your HTML and a bit of XSL.

7 – Conclusion

That’s it, you have got a functional Web Part to display your List. Using this method you can specify every parameters of the GetListItems method, as an example the ViewName parameter can prove usefull to filter items. If you need to test your parameter I would suggest you to try soapui.org. You can of course export this web part to put it another page, even on another page of another SharePoint farm (in this case, you will have to use the basic authentication mode unless kerberos authentication can do the trick). If you want to display another list you can just export the WebPart and edit the file before reimporting it. This might prove very useful to put this web part on a publication page as these pages can’t be edited using SharePoint Designer. If you need more details you can contact me by leaving a comment or using the "IM Me" box on the right of this page.

Sorting / Filtering SharePoint RSS feeds

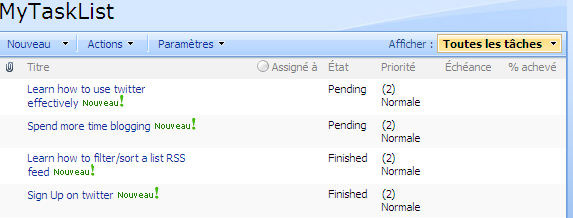
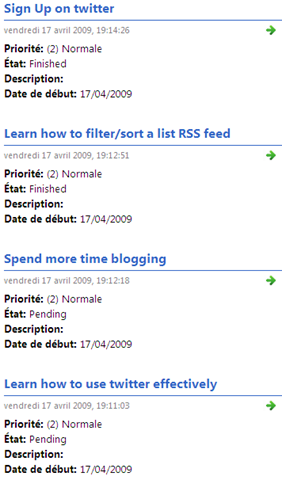
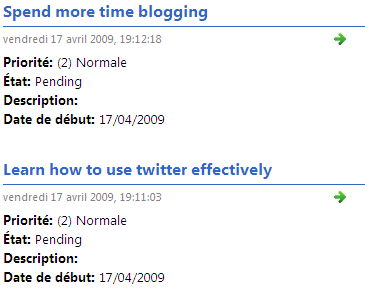
Really, REALLY BIG RSS feed button by photopia / HiMY SYeD on flickr.com Ever wondered if it was possible to sort or filter the automatically generated SharePoint RSS feeds? Well I did and, as a matter of fact, I found a solution. The idea is very simple, you create the view that will filter or sort your list elements according to your needs. You then take the guid of your view and append it to the feed URL. Et Voila ! Here is an example, let’s say I have a Task List (screenshot from a French MOSS farm, I am sure you’ll get the idea anyway) with some items pending, other finished. This status is defined in a “State” (Etat) column. image I first create two views filtering on the Etat column. One returns the pending elements, the other returns the finished elements. I then take note of the guid of my two views (Editing the views and extracting the &View=….. part of the URL does the trick). After making sure that RSS feeding is activated for my task list, I can go check the RSS feed at : http://MyServer/_layouts/listfeed.aspx?List=a4a88bd0%2Ddf29%2D4f54%2Da924%2D195be47346ed The results as displayed by IE7 looks like : image All the items are displayed whatever their status but let’s say that I want to see only the elements pending, so that I know what I need to work on. I just append "&View=<VIEW_GUID>" to the URL and here is the result : http://MyServer/_layouts/listfeed.aspx?List=a4a88bd0%2Ddf29%2D4f54%2Da924%2D195be47346ed&View=%7B9F3ACEAB%2D75DF%2D4C04%2D83C2%2D3A5733A6CA31%7D image By the way, I only tested this on a MOSS 2007 SP1 install. I would be interested to know if it works with WSS as well. I wonder if this is documented anywhere as I stumbled upon this feature by pure chance ? RSS picture credit Photopia on flickr